Mechanical Processes for the Surface Treatment of Components
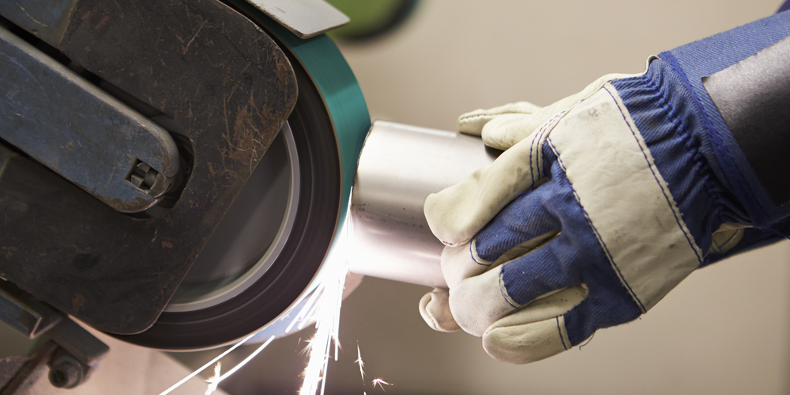
The surface finish of components used in the field of mechanical engineering as well as of other products is not only determined from a design point of view, but is mainly defined by the technical aspects. From the onset, the specification of the requirements regarding the condition of component surfaces, e.g. of a shaft coupling, often has far-reaching consequences on the product development process, the resulting costs and, eventually, on the succes of the final product.
Determination of Surface Requirements
When specifying the surface requirements, you determine the choice of materials and production methods at an early stage: the required properties of surfaces not only call for specific production sequences, they also influence the layout and the geometry of the component, the product functionality as well as the haptic properties (with respect to the value perception of the product) and appearance.

In almost all practical applications, the surfaces represent the most stressed areas of a component. Generally about 85 % of all failures are attributable to physical properties, which have not been adapted properly to the respective application conditions, in combination with the high stress the surface zone of components is subjected to. Because a component interacts with its environment via its surface.
By selectively influencing the chemical composition and the microstructure (mainly dependent on the selected material and production process), certain required properties of the component surface can be adjusted, such as:
- Hardness
- Strength
- Tensile
- Ductility (ability of a material to deform plastically before it fails)
- Fatigue strength
- Chemical resistance
- Thermal and electric conductivity
Roughness and gloss, in turn, are determined by the surface texture (component design in connection with the production process).
Evaluation of a surface
There are different parameters in use to specify surfaces more precisely. In practice, however, only two standard parameters are described with numerical values:
- The average surface roughness "Ra", and
- The mean roughness depth "Rz".
The problem, however, is that these two common parameters often only have a very limited significance in terms of the functionality of the surface.
For instance, the surface roughness "Ra" cannot differentiate between peaks and valleys, and, therefore, cannot recognize different profile forms. As it is based on the creation of an average, the values only vary little and are well reproducible. On the other hand, the mean roughness depth "Rz" reacts more sensitively to changes in the surface structure than “Ra”.
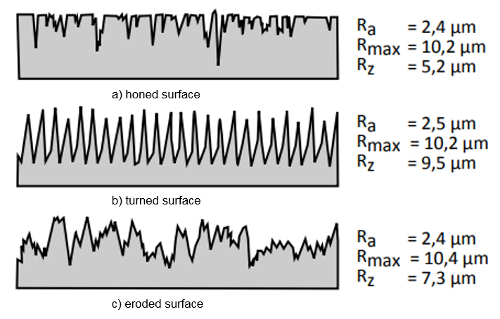
a) has good gliding properties and lubricant retention, while b) is prone to abrasive wear
In the following we would like to explain the classification of surface technology into its main categories of surface treatment and coating as well as the most commonly used surface treatment techniques.
Mechanical Surface Treatment
Mechanical surface treatment generally pursues three objectives:
1. Change of the surface roughness
You have two options here. You either polish the surface to make it smoother, or you roughen it to improve adhesion.
2. Cleaning and degreasing of surfaces
This is to ensure that the surface is free from any foreign matter such as rust or scale, and, of course, for removing old coatings.
3. Densification of surfaces
This method aims at creating more uniform structures or at achieving dimensional accuracy.
Polishing - Finishing Processes
Polishing is a smoothing finishing technique that is suitable for various materials. The smoothing effect is generally achieved by two mechanisms:
On the one side, roughness peaks in the surface structure are plastically and partly plastically smoothed (also called burnishing). On the other hand, and depending on the kind of polish used, a minimum to very small amount of material is removed (buffing) and surface imperfections like pits or scratches are filled in. The smooth surface thus obtained often has a glossy appearance. Tools with rotary buffing wheels made of cloth, felt or leather are mainly used for polishing metal materials.
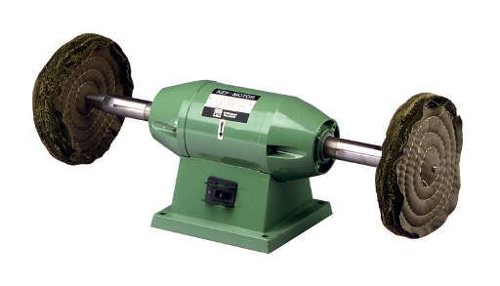
The actual polish compound is either applied as a suspension or paste onto the wheels which are also referred to as a polish carrier. The polish compound consists of different greases, oils and the actual abrasive. This may be alumina, aluminum oxide, chromium trioxide or similar.
Grinding
Grinding is an abrasive machining process in which material is removed by abrasive particles while the work piece and the grinding wheel are in relative motion to each other. It is a path-based cutting process to machine surfaces or to cut materials by using bonded abrasives. This can be done by hand or with a grinding machine. According to DIN 8580, this process is classified into the main category “cutting”. It also belongs to the group of cutting processes with a geometrically undefined cutting edge. The topic of vibratory finishing will be addressed in a later blog article.
Abrasive blasting
This is a surface treatment process in which a stream of blasting media is shot at very high speeds (up to 160 m/s ≙ 576 km/h) against the surface of a work piece. The abrasives can be propelled by compressed air, hydraulic fluids, electrostatics, electro-magnetism or centrifugal wheels. In addition to different machine types and blasting parameters, the result of the blasting operation heavily depends on the type of the selected blasting media.
The following objectives are achieved with this blasting technology:
- Descaling / Derusting
- Removal of paint / Stripping
- Core removal / Desanding (sand molded casting)
- Cleaning
- Strengthening of surfaces (shot peening)
- Chipping / Deburring (shot peening, sand blasting)
- Painting / Corrosion protection
- Surface matting / Surface finish
- Roughening
Shot-Peening
This process was invented independently in the late 1920s and early 1930s in Germany and the USA. It is characterized by subjecting the surface of a work piece to a “ball-peen hammer” with the aim of inducing compressive stresses in order to stabilize and increase the lifetime of the work piece.
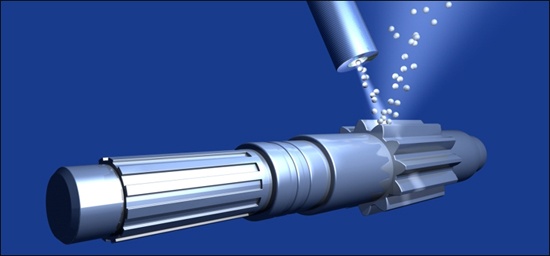
The process of shot peening is often used for power transmission parts in order to induce compressive stresses whereby the risk of fatigue cracking to occur during operation is reduced considerably.
By carefully observing blasting parameters like:
- Impingement angle,
- Peening duration and pressure (compressed air peening)
- Impact speed of the peening media,
- Type of peening media and
- Coverage
you can improve the lifetime of many work pieces such as gearbox parts, driving shafts, crankshafts, springs, turbine blades and turbine parts in general. The flow of the shot media is controlled magnetically or by means of weighing equipment, depending on the use of a metallic or non-metallic media. One important factor with shot peening is the reconditioning of the shot media, i.e. sorting the media according to shape and size.
You will learn more about the most common chemical surface treatment processes which are also used in the field of mechanical engineering in Part 2 of our series about this topic. Subscribe to our blog so you do not miss out on anything!

Comment